Learning from Kirsten Wolff
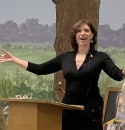
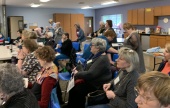
February 8, we brought our note-taking tools and our sergers along to the quarterly meeting. One of our talented and knowledgeable members, Kirsten Sidney Wolff, presented a morning overview called “Get Off on the Right Foot” to the chapter as a whole. The afternoon Beyond the Basics session was smaller, but it was an intense hands-on experience, using our sergers. Both were educational and entertaining. Kirsten provided a full-color, beautifully illustrated hand-out for this session and it was much appreciated.
The morning, tuition-free session was eye-opening to those, like me, who had never considered that there might be other feet available to do wondrous things with the serger. What kind of feet? Well, you could get a clear foot for better visibility, although Kirsten pointed out that it was not as sturdy as a metal foot. Also in the “more visibility” camp was the open toe foot, in case you’d really like to see what’s happening. There’s a ruffling foot, which not only finishes the raw edges of your ruffle, it also controls the amount of gathers via use of the differential feed. Kind of in the same family is the shirring foot, which makes stand-alone ruffles and simultaneously attaches tape for stability, if needed. Then there’s the elastic foot, which I think I now need! You can use it to attach and edge-finish various widths of elastic to … anything! The blind-hem foot does just that and the cording foot (another one I’d like to have) can be used to make stand-alone piping in various sizes. It can also insert piping into seams. Kirsten presented a great video showing the feet in action, as well as showing examples on garments.
All of the above feet may not be available for every brand and model of serger, but now that you know they exist at all, you can start doing research! There were an additional 5 feet available for coverstitch machines, which I don’t have, so I stopped taking notes. They are the cover/chain foot, the plain hemmer, the single downturn feller, the double-fold bias binder and the belt-loop binder.
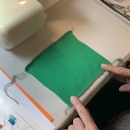
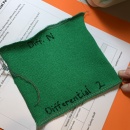
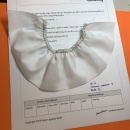
After our lunch, it was time to go Beyond the Basics. We set up our machines in the generous space available, fired them up and were ready to sew up some samples. Kirsten’s hand-outs were again fabulous and were supplemented by the awesome video. She had us work through 7 techniques. Each technique had its own explanatory page telling us what settings to use as well as a sample piece of fabric. There was adequate space on the page for note-taking, as well as a form to record our tension dial settings and general machine settings. We worked our way through adjusting the differential feed, gathering, 3-thread flatlocking, flatlocking on the fold, a secured flatlock seam, serger bias binding, and French bias binding. All of these techniques were done with the standard foot on our machine. In addition to the techniques, we also got a page of “serger truths” (only adjust one tension dial at a time, etc,) and “helpful hints” (sew a sample seam!).
We learned a lot. Kirsten’s presentation and materials were of exceptionally high quality; both were well thought out. For example, during the afternoon workshop, she had deputized helpers stationed throughout the room to deal with quirky machines or other problems. She was attentive to questions and generally answered them during the presentation, rather than waiting until the end. In summary: five out of five stars!
Joyce Plunkett
Quarterly meeting in the morning
Workshop afternoon

